
Disclaimer: the following is for informational purposes only. You will need to independently consult for expertise on any building or electrical code questions in your particular geography.
Once we decided to go the portable generator route, the next step was figuring out where we were going to keep it. I didn’t want it taking up precious space in our garage since hopefully, we would only use it on rare occasions. An outdoor enclosure seemed best.
Note: Roughly, this shed can be between $200 – $450 depending on your materials and extras like vents, exhaust extensions or fans. Getting a master plumber and master electrician to add a quick connect on your gas meter and adding a 50 Amp outlet to your panel with a transfer switch can run you another $1K or more. Then depending on the generator you get, it could be another $1500 – $2500+. For us this meant $2,750 – $3,950 total cost for our system or close to a quarter of our whole home generator quote.
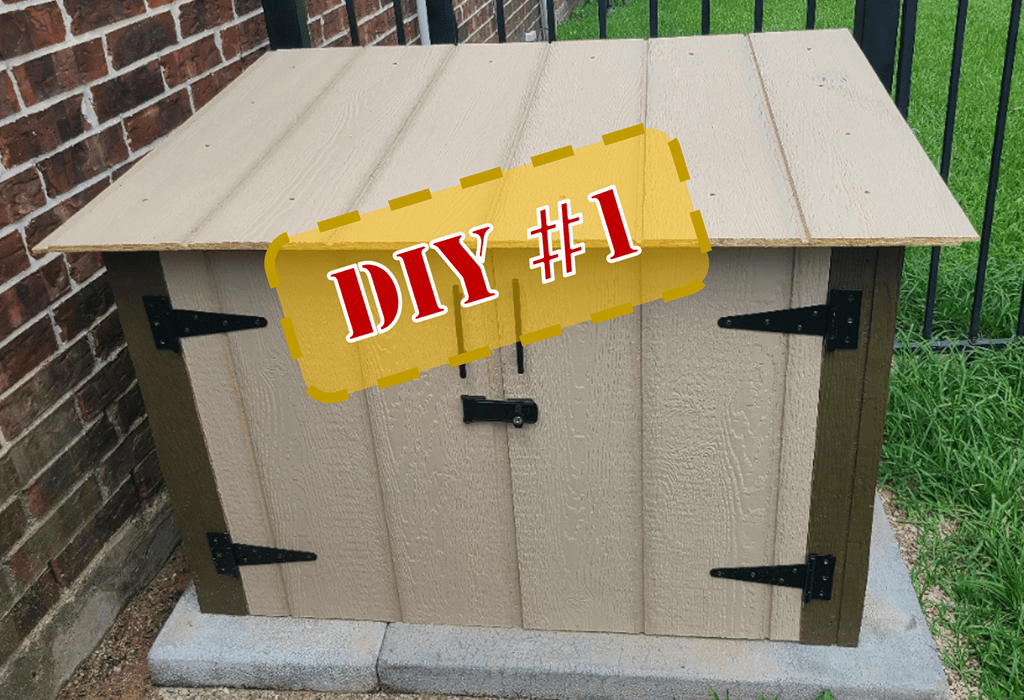
Please note, part of my enjoyment of DIY is figuring out things as cheaply as possible. It doesn’t necessarily mean skimming on quality, but rather finding good deals and seeing what’s out there. It also meant reusing items I already had at home. Here are some picture of the final results with instructions below if you are interested in building something similar for yourself.


Materials (and approximate costs)
By the way, there are no referrals here, so feel free to click away and find what’s right for you.
Lowes
- 4x4x10 treated – $17.18 each (or if you’ve replaced fence posts, parts may be salvageable)
- 2x4x8 treated (x4) – $3.98 each
- 4×8 exterior panel (x2) – $40 each
- Concrete paver 16×16 (x6) – $4.78 each or concrete mix – $6.98 each or thrift store find!
- Gutter screws (brown x2) – $1.48 each
- Exterior screws 1 ¼” (box) $7
- Drawer pulls x 2 – $1.68
- Screen mesh – $8.48
- Door hinge x2 $3.98
- L brackets x4 (optional)
- Light-weight chain or nylon rope (optional)
- Paint sample size can mistake (optional) – $2
Home Depot
- 5” exterior screws (x 24) – $.37 each (they actual sold individual screws!)
- 4×8 Foam board (optional) – $20
- 4.5” locking hasp (optional) – $11.27
Harbor Freight
- 6” gate hinges (x4) – $3.00 each
Dollar Store
- Door (cabinet) handles (x2) $1.25 each (optional)
- 1” Paint brush $1.25 (optional)
Amazon
- Dual fans/exhaust – various sizes, costs (optional)
- Small vents/registers – various sizes, costs – $7 each (optional)
- Exhaust extension pipe/hose – $70 (optional)
Tools
Power Tools
- Circular saw
- Jig saw
- Table saw
- Miter saw
- Power Drill
Other helpful Tools
- T-square
- Drill bits/Spade bit
- Right angle square
- Rubber mallet
- Pencil/Sharpie
- Box cutter/drywall saw
- Level
- Tape measure
Step 1: Placement & Design
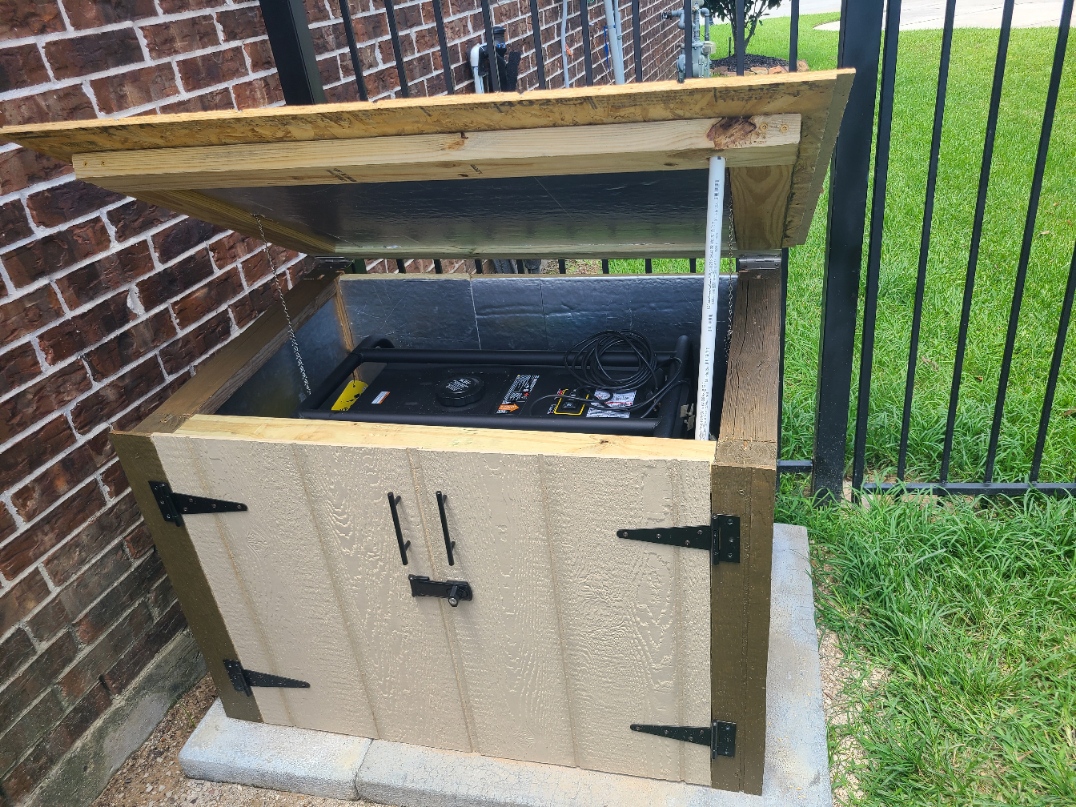
There is mixed guidance on this, so I will withhold comments for now, but where you place your generator will determine accessibility and placement of any vents or exhaust fans you want to include. I wanted this for mine as well as an openable, sloped top and doors.
Step 2: Dimensions
I was hoping to find a pre-made storage box or shed, but my generator dimensions didn’t work out without getting a really big one. Since I was mostly thinking about just keeping it outside versus operating in an enclosed space, I took some liberties on dimensions.
To make my shed work, I decided *not* to add the wheels on my generator. Instead, I placed a 4×4 block and secured it with a screw in case the vibrations proved too much. I figured this was also a theft deterrent as it would be tough for someone to pick this beast up.
Since I’m mostly wanting this as an outdoor enclosure, I decided on dimensions that were closer to the size of my generator, approximately 30(L)x23(D)x26 1/2 (H).
Step 3: Pad
I originally purchased 16×16 concrete pavers to do a 32×48 base. I then lucked out and found two light-weight concrete pads (UltraLite®) at a home renovation thrift store to create a 36×52 base which worked even better to create a balanced placement. It cost me about $40 in total, but well worth it to avoid having to level six pavers. Alternatively, you can pour your own concrete base. Regardless, you will need to clear out your area of any grass and get it leveled before installing your pad.
Step 4: Box Frame
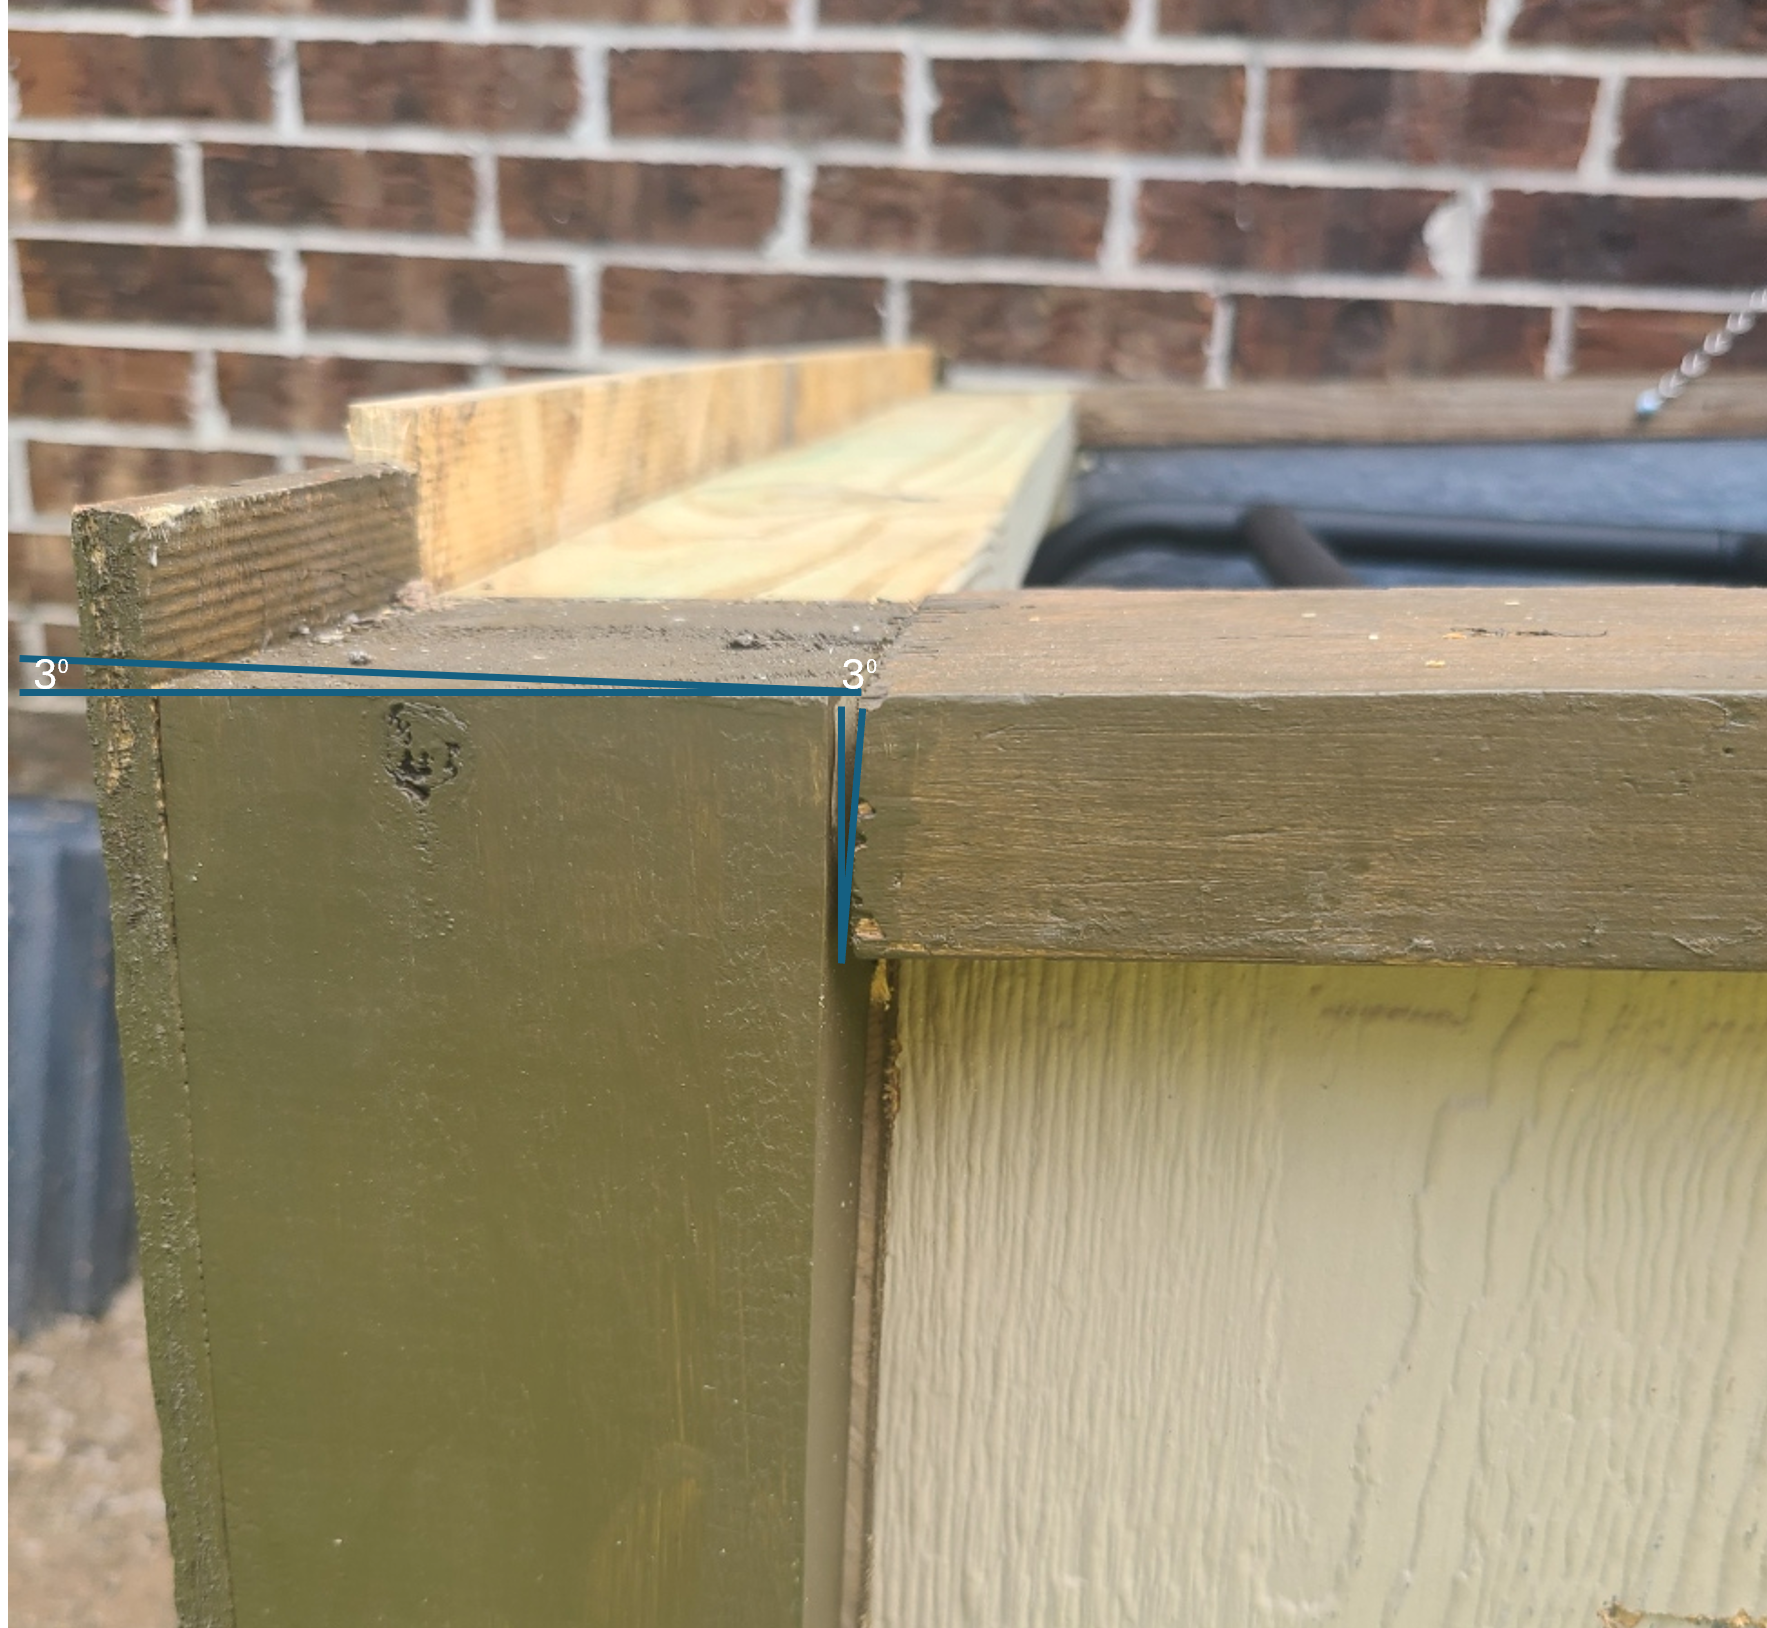
Cut your 4x4x10 into two sections of 30″ and two 29″ long. Mark the two shorter ones at 28″ and cut it at a 3 degree angle with your miter saw. The front face of these pieces should measure 28″ and the back would be around 28 1/8″ to give you a slope. The two sloped posts will be your “front” 4x4s, the other two are your “back” 4x4s. Next, we’ll cut grooves.
“Top Side Support”
“Front 4×4”
Adjust the blade of your table saw to about ½” depth. Mark the centers of your 4x4s and adjust the guide on your table saw so that the blade is right next to the center line you marked.
For your two “back” 4x4s, you need grooves on two sides next to each other (not across from one another).
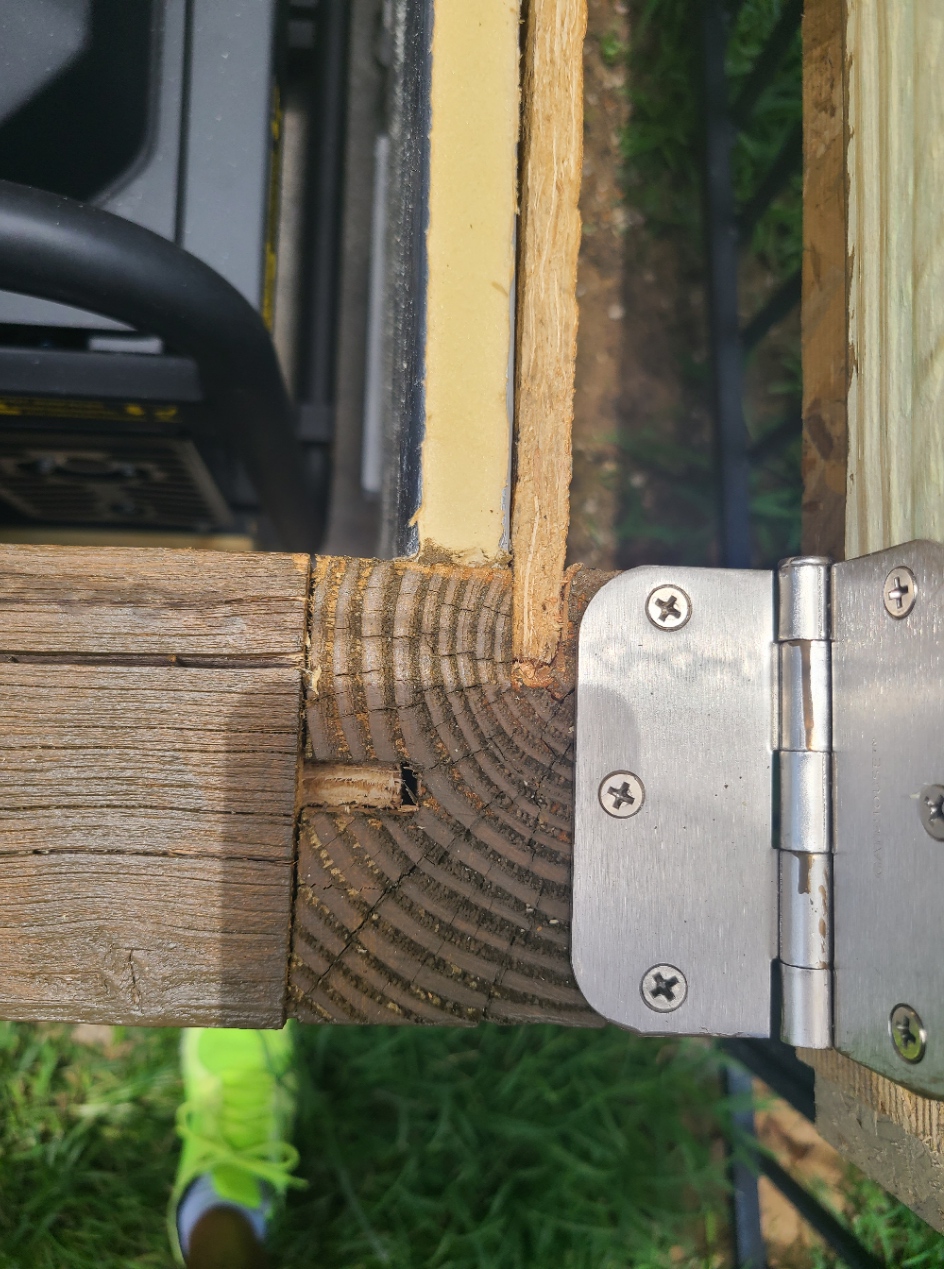
For the “front” 4x4s, you will only cut a groove on the “longest” (back) side.
Run each 4×4 through your table saw to cut a groove. Flip the orientation of the 4×4 and run it again to cut a groove on the same side. This should give you that ½” groove you will need for your panels. It should be pretty clean, but if not, use a flat head or narrow chisel to clear out the middle part debris. Alternatively, if you have a circular saw or router and straight edge, you could also creates these groove (and probably better) – I’ll get my router yet!
Next, cut two 24″ pieces from one of your 2x4x8s and run it through the table saw to make grooves on one side of both pieces. Cut one end of each piece vertically using your miter saw that was already set for 3 degrees. These are your “top side support” pieces.
Step 5: Box Panels
Use your circular saw to cut two, 48×30 strips from one of the 4×8 exterior panels. Cut one of those strips in half. The two resulting pieces will be the side of the box and the full strip will be the back panel. The remaining exterior panel piece will serve as your top.
Sides
The side panels need to have a downward slope starting from the back. To make an incline, make a mark on right of the side panel 29 1/2″ from the bottom. Now mark the left of the side panel 27 3/4″ from the bottom. Draw a line to the opposite corner. Do this for both panels keeping the “nice side” facing outward. Cut the panels at this angle using your circular saw.
Back
Depending on your desired width, you may want to cut your back panel. At a minimum, I recommend cutting the 1” overlaps on each side of the panel. This will ensure a tighter fit with your 4×4 back posts. I cut mine to 39×30.
Doors
Cut a 48×29 strip from your other 4×8 exterior panel. As you noticed, the height of our shed is 30″, but this one inch difference is to provide ground and top clearance for your doors. Cut the strip into two; these are your doors.
Measure the length of your back panel and divide by two to get your door width. Both door halves will have an “overlap” strip on one side. Cut the side opposite the “overlap” to this measurement. When placed together, your “closed” doors should be as long as your back panel minus about an inch.
Add the long part of the gate hinges on both “non-overlap” sides using the brown gutter screws. Add your door handles (you will need to use shorter pan screws or washers for a good fit). You can also use the gate style drawer pulls listed above with gutter screws instead.
Optional: As mentioned, you can cut your back panel to be a bit shorter. Using scrap pieces, I cut two 3.5″x29.5″ pieces to cover the “front” of my front posts to create a more consistent look. I attached these right before installing the doors.
If you are just building a box mostly for outdoor storage or running with door and/or top open, proceed to Step 7.
Step 6: Ventilation/Exhaust (optional)
Choose the location of your vents and exhaust. In my case, I found metal floor registers at a thrift store which worked for me. They sell 4×10 plastic ones on Amazon for about $7. I didn’t care to open or close them, so I decided to leave them open. To minimize bugs getting in though, I used some leftover window screen material and taped/glued them to the back of the vents/registers.
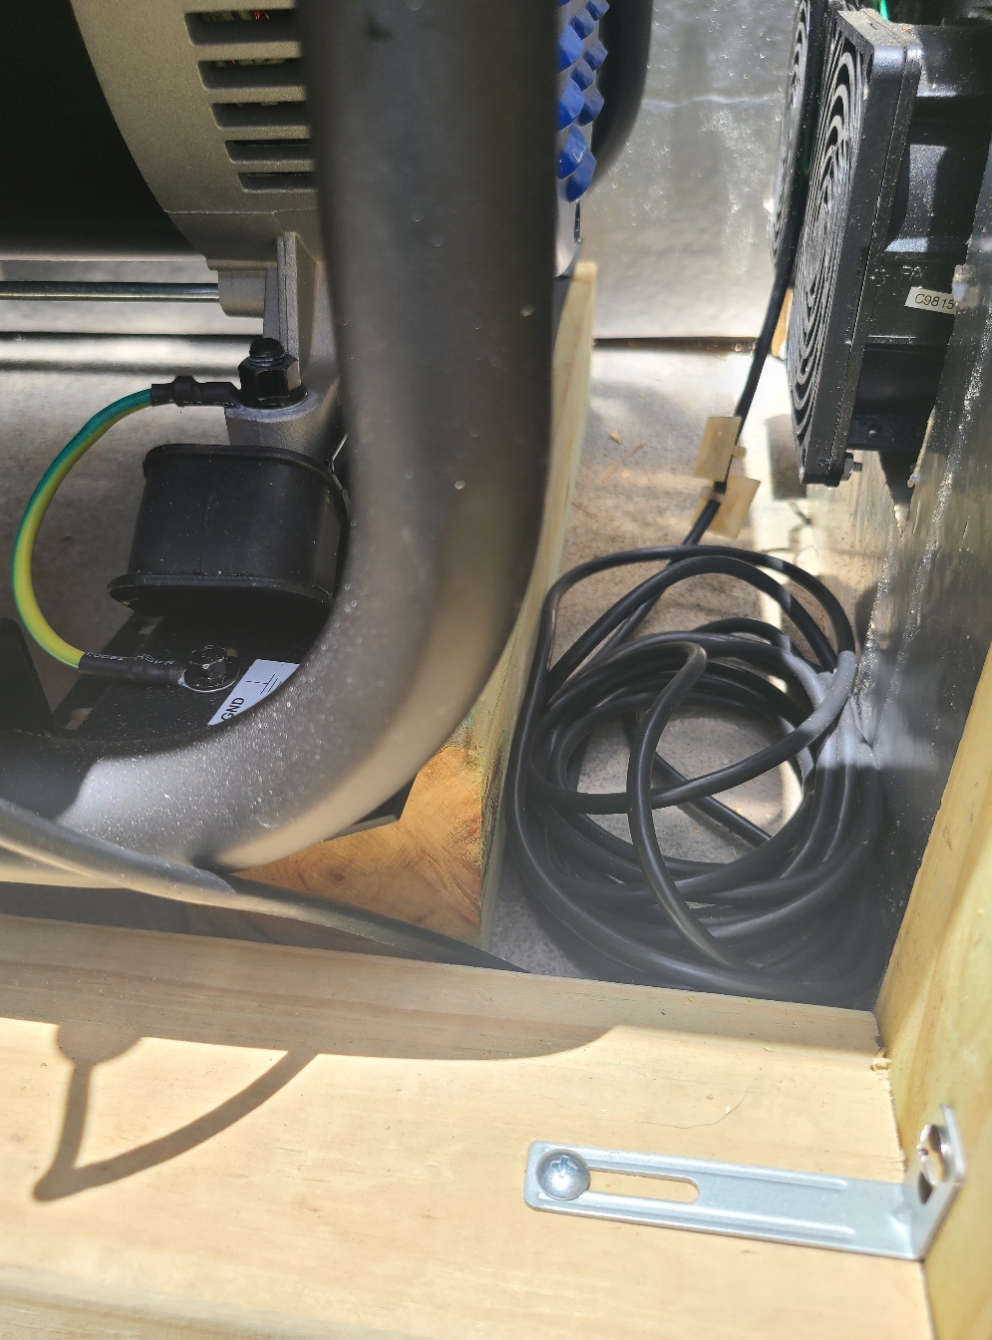
For the exhaust, I used twin fans that were once part of a computer server rack. I will plug it into one of the 120V outlets on the generator so that when it goes on, it will also power the fans. Although I’m planning on running my generator with the doors open, I figured this could at least help with air movement.
Once you have your design, mark the locations on your panels. Use a spade drill bit to make cut entry holes, then use your jigsaw to cut out spaces.
Step 7: Box Assembly
Fit the back panel in between the grooves of your “back” 4x4s. Measure the inside distance between the two back posts and cut two 2x4s to match the length. These will be your “front support” pieces. Mine were 37 1/2″ long.

Next assemble the side panels with the “front” posts. Since I didn’t want to lose any depth for my shed, I used the “overlap” thin strip I cut from my back panel into four roughly equal pieces. I then wedged them in the front posts to compensate for the overlap strip of the side panels. A rubber mallet was useful in getting things snug.
Slide one of the 2×4 “top side support” pieces at the top of one side panel, in between your front and back 4x4s. Measure the excess and cut the other side of the support piece using your miter saw (still at 3 degrees). Mine was 22 3/4″ long.
Repeat for the other side as well.
Use a long drill bit (no thicker than your 5” screw) to pre-drill two holes from your back posts towards the top side support 2x4s. Repeat for the front posts. Using your 5” screws, secure the posts to the “top side support” pieces. If you cut those optional 3.5″ panel covers above, you can install this now using a couple 1 1/4 exterior screws.
Depending on your pad location and your access to your shed, these steps will vary, but basically, place one “front support” piece between your two front posts at the bottom. Pre-drill and secure with 5” screws. Repeat the same for the top front support piece. Since I didn’t have much space to maneuver, I used “L-brackets” to secure the top and bottom “front support” 2x4s. These two pieces should add more stability/rigidity to your box.
Using a friend or 1/2″ board, partially install your two doors by securing each hinge to your front posts using ¾” screws at the top and bottom hole for each hinge. Test your placement first to ensure hinge distance.
Step 8: Top Frame & Assembly
Measure the outside distance between your two back posts (44 1/2″ for mine) and cut two pieces from your 2x4x8. Measure the inside distance between your front and back posts (22 3/4″ for min). Use another 2x4x8 to cut two pieces.
Laying your pieces down, pre-drill and assemble the top frame. Note the pieces will be attached horizontally (laying flat). On one end of the frame, attach one side of your door hinges.
Place your top frame over your assembled box making sure the top is aligned to the rest of your box frame. Place the exterior panel piece you had left over and center it. Attach to your top frame using exterior screws. Remove the top and place it to the side for now.
Step 9: Noise insulation (optional)
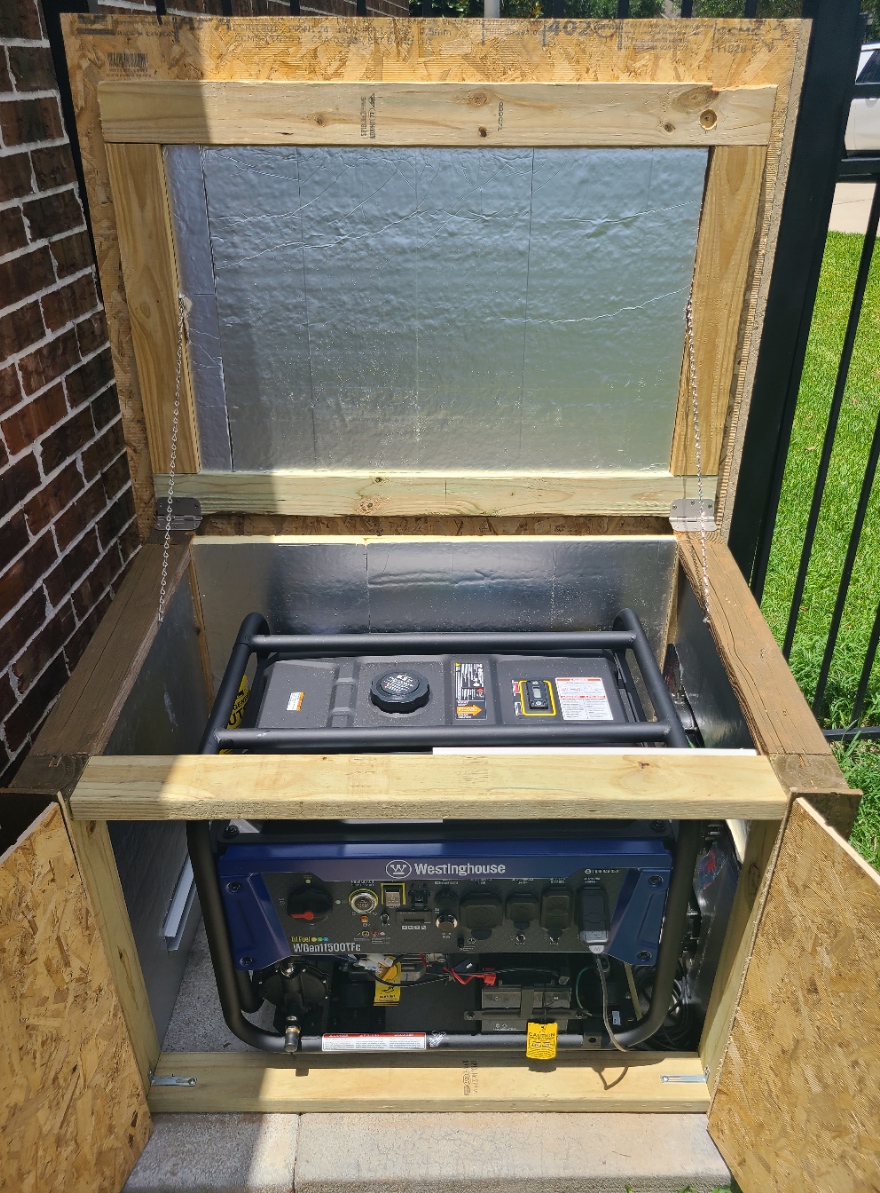
Cut your 4×8 foam board in a similar fashion to your exterior panels. Place them inside your assembled box and if you added ventilation, mark the areas. Remove the foam panels and cut openings using a box cutter or drywall saw or cut the openings in place.
Measure the inside of your top frame and cut foam board to fill the area. To minimize material waste, try to use pieces of the foam board to make it work (no one is going to see the inside anyway)
If using ventilation or exhaust fans, now attach them to the box.
Step 10: Placement and Polish
Wheel your generator over to your pad and center it. Add a 4×4 or other support if you plan to remove the wheels like I did.
With the help of a friend, pick up and put the box frame over the generator. You may need to remove the “front support” bars for ease of mobility. You will also need a friend to help you hold the doors while you secure them. You will also need help holding the top while you attach the hinges to the top of the back posts.
Optional: Use some scrap chain or rope to brace the top from going all the way backwards. Add a screw (eyelet screw works if using a rope) less than halfway on the inside of the top frame. Measure and do the same on the other side. Use a chain or rope and secure it to the top frame. While holding the frame open, slightly tilted back, extend the rope/chain and mark a spot on the top box frame to attach the other side of the rope. Do this to the other side as well.
Lastly, since I planned on having the top open when running, I used and piece of 1/2″ PVC, made a hole on one end and used two screws. One screw went through the hole attached to the right “top side support”, the other was placed underneath the PVC pipe as a pipe holder.

Using a spade bit I also made a shallow hole in the top to avoid having the pipe slip on me.
Extra bonus: If you want to lock your doors, consider using a locking hasp. I used a 4.5” one. It helps keep the doors closed in case it gets too windy. Also, I’m not sure how much of a theft deterrent it would be, but it may be enough to discourage those with sticky fingers. I’ve also seen people add a bolt in their concrete mix to chain their generator or chaining it nearby to another structure.
Finally, when I walked by the “oops” paint section in Lowes, I found a sample can of brown exterior paint for two bucks. I painted the borders and posts to give it a more finished look.
Future mods: I’m considering using PVC with an end cap to make a opening in the shed. I could then run the gas hose and the cable from the generator while it’s fully enclosed. I’m waiting on getting my 50-amp outlet installed, but once it’s ready, I’ll test the setup and post results.
I hope this was useful to you. I don’t profess to have all the answers, but I’m happy to help answer any related questions you may have. Good luck!
Update: We recently have been having a bout of hard rain. The shed has held up nicely and kept my generator nice and dry!

Leave a comment